How to Build a Simple Golf Practice Station


|TGAlogo-pc")
Nick Lewis PGA Assistant Golf Professional heads up the Treetops Golf Academy, a Golf Channel Academy and offers a simple how-to on setting up a practice station.
I have the distinct pleasure of having my office located on the Jones Masterpiece Driving Range at Treetops Resort in Gaylord, Michigan. This unique vantage point allows me to observe both good and bad golfers practicing daily between my lessons. I've also had the fortune of working at multiple golf clubs where PGA Tour players practice and play between tournaments. Over the years, I’ve noticed some very clear distinctions between what good players do and what bad players don’t do when they hit balls. As a golf instructor, my role extends beyond teaching golfers the best techniques to improve their game; it also involves motivating them to practice and showing them how to practice effectively. Setting up a dedicated golf practice station is one of the best ways to create a structured and productive practice environment.
4 Easy Steps To Build a Golf Practice Station
The following details how to build a simple practice station that I have my players use during their sessions. First and maybe most importantly… alignment sticks. This is something that every golfer should have in their bag. PGA Tour players think so much of their alignment sticks that companies like STITCH and Headgear Golf, among others, are starting to make special head covers just for the sticks. Here's how to use them correctly:
- Step 1 - When picking your target on the range take a stick out and lay it on the ground pointing at that target. Now, this seems pretty obvious, but most people don't even pick out a specific target when they go hit balls. In my opinion, this is the main reason behind the old line "I hit it great on the range, but then everything changes when I get on the course." Well that's because it's easy to hit a ball onto the range, try picking a smaller target, say the size of a green or fairway and trying to hit that instead.
- Step 2 - When taking your stance make sure that the stick is equal distance between your feet and the ball. One big misconception with alignment is that your feet are supposed to aim at the target. The feet are actually supposed to aim on a parallel line to your target line.
- Step 3 - Take out a second stick and place it in the ground standing straight up between 5 and 7 yards out in line with your target. This is very important, because what you will start to notice is your tendencies for the initial direction of your golf ball. While you are practicing, try to take notice which side of the stick the ball tends to pass by based on the type of shot you are trying to hit. This will give you a lot of feedback on what the club face is doing during the golf swing which is the main thing controlling the initial direction, or azimuth of the golf ball.
- Step 4 - Make a divot line. This is probably the most frustrating thing for golf professionals, not to mention course superintendents. When most amateurs practice they find the best piece of grass possible, prop the ball up on that grass and then hit it. This creates divot patterns that destroy practice tees. It also makes it almost impossible for the player to aim correctly and to prepare for the course (unless the player does that on the course also, which is a whole other article). Instead - try hitting the ball and then placing another ball directly behind the divot from the previous ball. After awhile you will notice a line forming. Now this line will give you a ton of feedback on what the club is doing through impact. I could make an argument that we could get information on all 5 of the ball flight laws simply based on looking at that line. Things like, angle of attack, the path the club is traveling on, club face angle at impact, etc. The better you get, the straighter and more parallel to your alignment stick the line should be. When you are ready to aim at another target or switch clubs, simply move your sticks and create a new line.
Other Articles You Might Enjoy

Firecracker Tips to Light Up Your Golf Game
Let Freedom Swing: The 4th of July isn’t just about fireworks and flags-it’s the perfect time to ignite your golf…
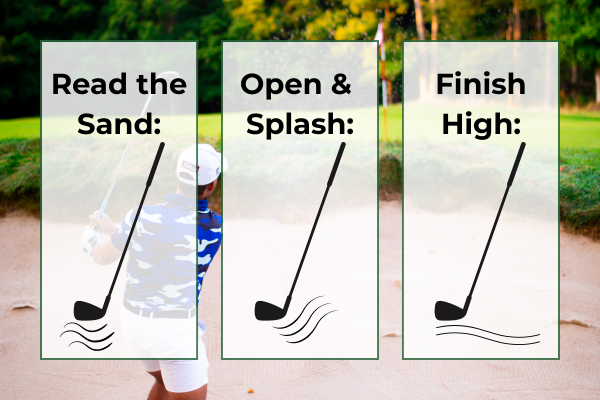
Treetops Bunker Basics: The Trouble with Beach Time
The Trouble with Beach Time At Treetops, our bunkers aren’t just accessories-they’re plot twists. One minute you’re striping drives down…
The Dad Index: What Kind of Golfing Dad Are You Shopping For?
Father’s Day gifting comes with its own set of hazards. This year let’s club up. Instead of another forgettable gadget, fit Dad…

Chasing Daylight: Celebrate Summer Solstice The Treetops Way
When you step onto a Robert Trent Jones Sr. designed course, you’re not just playing a round of golf –…

From Tee to Legacy: Celebrating Dads Who Golf
From Tee to Legacy: Celebrating Dads Who Golf Playing golf with your children isn’t just about perfecting a swing or…